


1
Easy-to-control placement
The stick format helps you place color exactly where you want it instead of covering a large area at once.
Couldn't load pickup availability


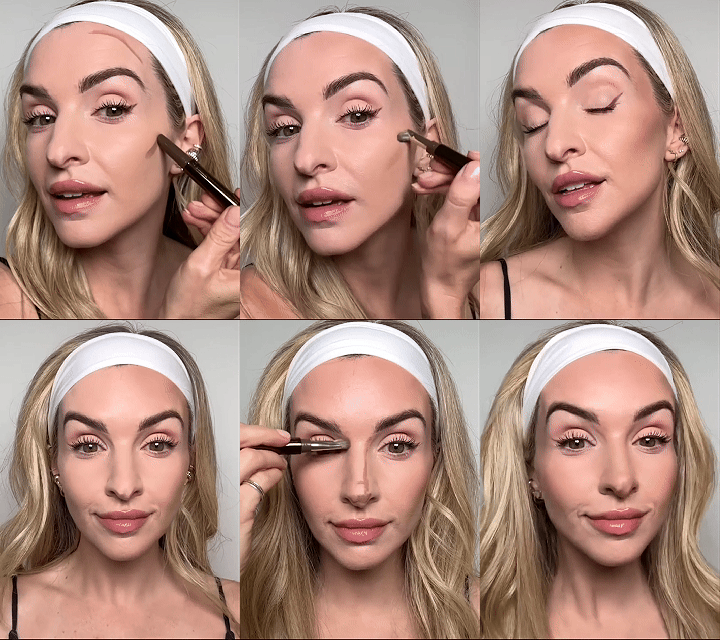
Add natural-looking dimension, then soften the edges with the built-in blending brush — all with one easy-to-use contour stick.
Apply only where you want more definition, then blend until the edges look soft and natural.

No need to switch between several contour products and tools. Apply, blend, check your result, and add more only if you want it.
The stick format helps you place color exactly where you want it instead of covering a large area at once.
Turn to the built-in brush and soften the contour without reaching for another makeup tool.
Start with a small amount for subtle definition, then layer only where a little more depth is desired.

The goal isn't a heavy stripe. For an everyday look, use a small amount and blend until the color becomes a soft shadow that works with your natural features.
You do not need a complicated contour map for everyday makeup.
Apply a small amount beneath the cheekbone or around the areas where you naturally want more depth.
Use the built-in brush with light pressure and short motions until the edges soften into the rest of your makeup.

This approach makes contour easier to control and helps avoid harsh-looking lines.
A gentle hand gives you more control over how much color appears on the skin.
Around the cheeks, softly blending upward can help keep the finished look fresh rather than heavy.
One light layer is easier to soften than too much product applied at once.
Step back from the mirror occasionally to make sure both sides look balanced.
Face shape changes where shadows naturally fall. Use placement as a guide — not a rule.

Rather than copying every line in a diagram, choose only the areas you would like to define. Everyday contour can be as simple as one soft cheek placement on each side.
If you contour the nose, begin with very thin placement. The closer contour sits to the center of the face, the easier it is to notice excess product.

A small amount of contour placed toward the outer eye and temple can visually change the direction of your makeup. Keep the product on the surrounding facial area and blend carefully.

Contour changes the appearance of light and shadow on the face. It does not physically alter facial structure.
Especially when skin feels drier or makeup tends to settle into texture, the simplest approach is often the most flattering.
Apply your normal skincare first and allow it to settle before beginning makeup.
Light pressure helps you avoid depositing more pigment than you intended.
Blend the edge rather than repeatedly adding more product over the same area.
When you're unsure how much contour to use, follow this simple order:
Begin with less product than you think you need.
Soften the edges before judging the final depth.
Look at your whole face instead of one small area.
Build another thin layer when you want more definition.
The contour stick includes a built-in brush, so you can apply the cream product and blend it using the same 2-in-1 format.
Start with just the cheek area. Apply a small amount, blend it completely, and stop there if you like the result. There is no need to contour every part of the face.
Use less product initially and build in thin layers. Blending each layer before adding more gives you much more control.
No. The diagrams are visual references. Facial features vary, so use only the placements that make sense for the areas you personally want to define.
Contouring is a cosmetic technique that creates the visual impression of light and shadow. It does not physically change facial structure, and individual results will naturally vary.
Review the product ingredients before use and consider testing a small area first. Discontinue use if irritation occurs.
Good contour doesn't have to involve a long routine. A small amount, thoughtful placement and soft blending are often enough to create natural-looking dimension.